
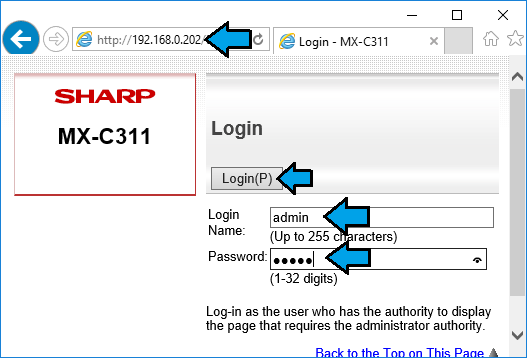
- In a web browser, enter the IP address of the Sharp MFP into the address bar. Enter administrative credentials (default: L/N=admin P/W=admin) and click Login(P).
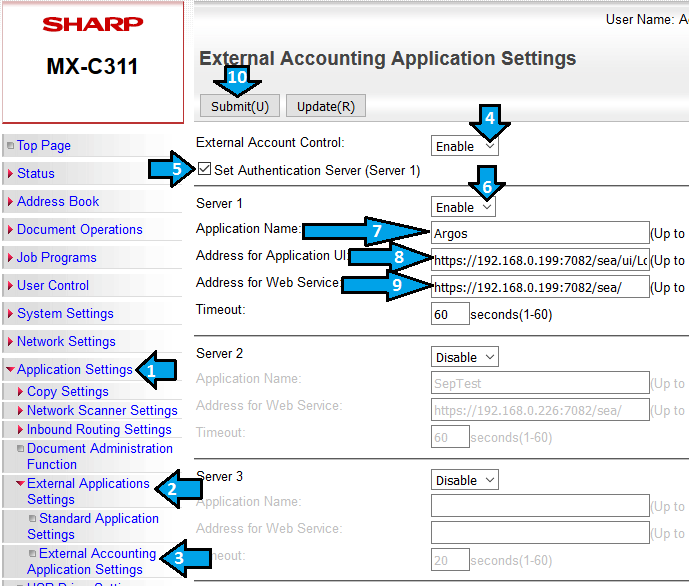
- On the left side of the window, click Application Settings(1) > External Applications Settings(2) >External Accounting Application Settings(3).
- From the External Account Control(4) drop down list, select Enable.
- Check the box next to Set Authentication Server (Server 1)(5).
- From the Server 1(6) drop down list, select Enable.
- In the Application Name(7) field, type Argos.
- In the Address for Application UI(8) field, type https://YOURARGOSSERVERIP:7082/sea/ui/LogonByUsernamehtml.htm (see below for older Sharp models).
- In the Address for Web Service(9) field, type https://YOURARGOSSERVERIP:7082/sea/. Click Submit(10).
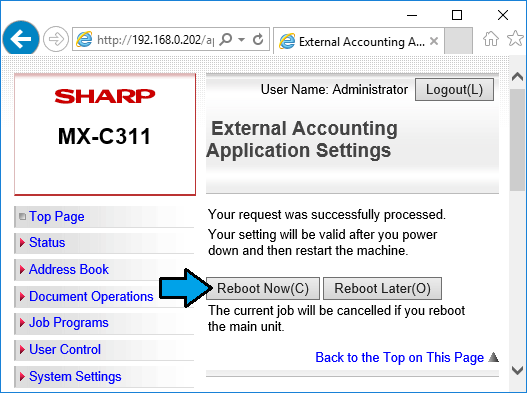
- Click Reboot Now(C).
Legacy Devices
Some older Sharp models cannot display HTML on the device panel. For these models, use the following URL in the Address for Application UI:(8) field from step #7 above:
https://YOURARGOSSERVERIP:7082/sea/ui/LogonByUsername.htm
The following model series require the Legacy UI:
- AR-31x
- AR-35x
- AR-45x
- AR-55x
- AR-62x
- AR-70x
- MX-M350
- MX-M450
- MX-M550
- MX-M620
- MX-M700
- MX-230x
- MX-270x
- MX-350x
- MX-450x
- MX-550x
- MX-620x
- MX-700x
- MX-M85x
- MX-M95x
- MX-M110x
0 Comments